Is it possible to get data from MySQL and display it on RDLC Report? Actually, as long as you can store your data into DataTable, DataList, or Collection, it is very possible.
So, in this post, I will show you how to display MySQL Data on RDLC Report. And I use MySQL Connector Net for connecting to MySQL Database.
Further how to use MySQL Connector Net:
https://rani-irsan.blogspot.com/2019/11/connecting-vbnet-to-mysql-database.html
Once the connector is downloaded and installed, you can start to follow this step of this tutorial.
I've already made a desktop application with VB.NET language named RDLCMySQL.
We need to add MySQL Data as reference. Go to the solution explorer and right click on the project node then Add --> Reference....
The MySQLData.dll that is used must suit the Framework. The connector installer is 8.0.27 version and the Framework used is 4.5.2. So, I choose the Browse tab and go to C:\Program Files (x86)\MySQL\MySQL Connector Net 8.0.27\Assemblies\v4.5.2
Choose and add MySQL.Data.dll.
Check the checkbox of the selected file then click OK to add the reference.
We need a Dataset to define data structure so right-click on the project node --> Add --> New Item...
Choose Data, DataSet, then you can rename the dataset object but here I let it as the default.
DataSet has been already added, then double click on it to open the design view.
Right-click on the DataSet1 design area -> Add -> DataTable
For this sample, I'll name "class" for the DataTable. Because we'll get data of class product from the database table named class.
Add 2 columns then right-click under the DataTable name --> Add -> Column.
Name its columns by reference to the field name of the database table. The class table on the MySQL database will be as below:
Done with the DataSet, don't forget to Save All. Now we're going to add an RDLC report by right-clicking on the project node -> Add --> New Item...
Choose common item then find Report, you can give it a name or leave it as the default name then click Add button.
The design Report.rdlc will be displayed as below.
The next step is adding a dataset to the report. If the report data panel is not displayed, call it from the "
View --> Report Data" menu.
Then on the Report Data, right-click on the DataSet folder, choose
Add Dataset...
Dataset Properties dialog will be displayed. It would be better if you name it similar to the table name on the database/dataset. I did name it "Dataset1" but it's okay. Let's just continue with it. Because we've already had the DataSet1 object on the project/solution, so it will be listed on the Data source dropdown.
In the selected data source choose one of the available datasets (in this as the object is DataTable), which is listed on the Available datasets dropdown. We only have one that is "class table". When we choose it, the names of its fields will be displayed on the Fields grid. Then click the OK button.
The DataSet1 has already been listed under the Dataset folder, it contains classcode and classname fields.
Back to the UI design report, open ToolBox panel then choose Table to be added to the report.
That table named Tablix1 (by default) and let's set DataSetName property to be DataSet1.
Three columns will be generated automatically, but we only need 2 columns so delete a column by selecting the column that will be deleted, right-click, then choose Delete Columns.
The first row is column header, where we type the caption of each columns.
We've already selected DataSet1 for this table, so we can click the small icon on the top-right corner of each cell to choose what field will be displayin on it.
Next, add a Text Box for Title of report.
The title is "Class of Product". We can format this Textbox with font name, font size, bold, and alignment.
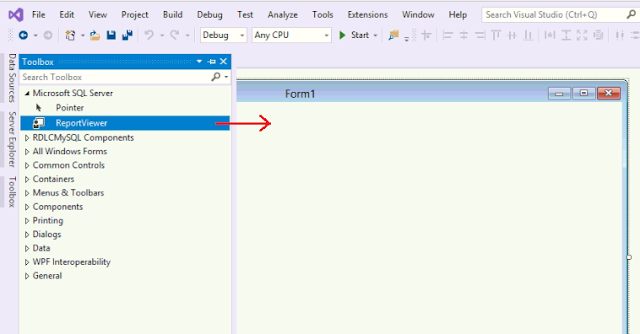
This report will be displayed on Form1 using a ReportViewer.
If report viewer has not been displayed on toolbox we need to add it by NuGet Package. Please check below articles:
Make report viewer to fill all form area, then set anchor property to all sides (Top, Bottom, Left, Right) so the report viewer will still fill all area when the form is resized.
Like I said before that I use MySQL Connector for database connection. If you're using also, you can use the database module I made to simplify your code that can be download by link below:
Update: if you're using Visual Studio version before 2015, you can download this one. 👇
After downloaded, copy the modDatabase.vb file into project folder.
Then back to the Visual Studio in Solution Explorer, activate
Show All Files icon, so modDatabase.vb will be displayed vague. Right click on it then choose
Include In Project, so the file becomes part of the project.
In the moduleDatabase, you have to adjust the connection part with your own settings:
And this code below is code behind the Form1.vb:
Imports Microsoft.Reporting.WinForms
Public Class Form1
Private Sub Form1_Load(sender As Object, e As EventArgs) Handles MyBase.Load
GetDatabaseSetting()
Me.ReportViewer1.LocalReport.ReportPath = "Report1.rdlc"
Dim dtClass As DataTable = _
GetDataTable("SELECT classcode, classname FROM class")
Dim dataSource As ReportDataSource = _
New ReportDataSource("DataSet1", dtClass)
ReportViewer1.LocalReport.DataSources.Clear()
ReportViewer1.LocalReport.DataSources.Add(dataSource)
ReportViewer1.SetDisplayMode(DisplayMode.PrintLayout)
Me.ReportViewer1.RefreshReport()
End Sub
End Class
Code above will run on form_load event and will display Report in ReportViewer. The yellow highlighted code is simplified code to get data from MySQL by using the modDatabase.vb file.
The GetDatabaseSetting() procedure only need to be called once, that is when the application start up. After it's called then the GetDataTable() can be called many times as needed.
We've done with the code, but before debug running, don't forget to set these 2 properties of the report file:
Both property will appear while we selecting Report1.rdlc in Solution Explorer.
Build Action = Content, is used to inculde report file to the installer package.
Copy to Output Directory = Copy always or we can also choose
Copy if newer, it works to copy the report file to the debug folder.
So, let's start to run debug.
I set the zoom setting into PageWidth, so we can see the table more clearly
Download Sample Project


1 Comments
Terimakasih