- How to connect VB.NET to MySQL database
- How to binding MySQL data to DataGridView
- How to binding MySQL data to ComboBox List
I divide this topic into 4 parts. Make sure you have read the previous article.
- How to Create, Read, Update, Delete (CRUD) - Part 1
- How to Create, Read, Update, Delete (CRUD) - Part 2
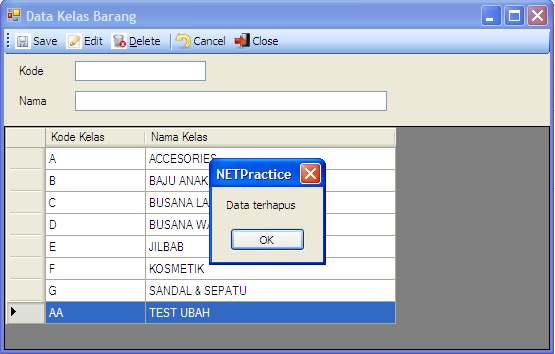
The next process is to delete a row. What users do for deleting is they choose a row to delete then click the Delete button. I also add a message for confirmation before the actual delete process. The code below is typed under tbrDelete_Click event.
Private Sub tbrDelete_Click(ByVal sender As System.Object, _
ByVal e As System.EventArgs) Handles tbrDelete.Click
If MsgBox("Yakin akan menghapus data?", MsgBoxStyle.YesNo, _
"Konfirmasi") = MsgBoxResult.No Then Exit Sub
Dim myCommand As New MySqlCommand
conn = New MySqlConnection()
conn.ConnectionString = "server=localhost;user id=root;" & _
"password=;database=database"
Try
conn.Open()
SQL = "DELETE FROM class WHERE classcode = " & _
"'" & grdData.CurrentRow.Cells(0).Value & "'"
myCommand.Connection = conn
myCommand.CommandText = SQL
myCommand.ExecuteNonQuery()
MsgBox("Data terhapus")
tbrCancel_Click(Nothing, Nothing)
conn.Close()
Catch myerror As MySqlException
MessageBox.Show("Error: " & myerror.Message)
Finally
conn.Dispose()
End Try
End Sub
Last code to be added is under tbrClose_Click event. Its function is to close the form.
Private Sub tbrClose_Click(ByVal sender As System.Object, _
ByVal e As System.EventArgs) Handles tbrClose.Click
Me.Close()
End Sub
All done with CRUD. Let's try to run.
Get complete code here.
This tutorial also available @youtube:


0 Comments